UIImageView 사용하기
이미지를 프로젝트에 추가하고 imageView에서 사용하는 방법입니다.
이미지를 추가하는 방법은 두가지가 있습니다.
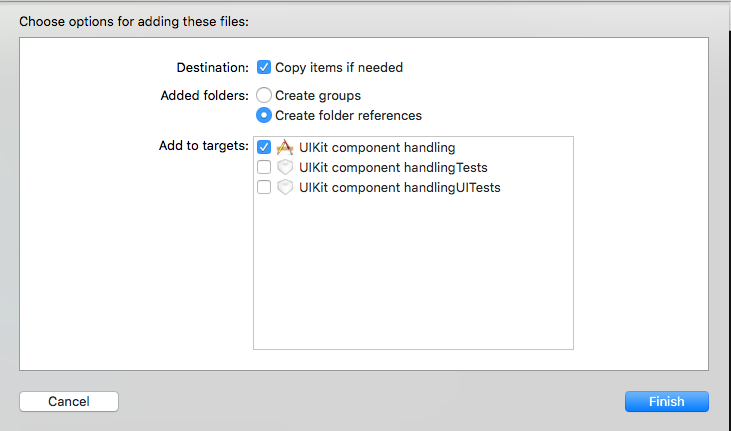
1. 드래그 앤 드랍으로 추가하기
-> 옵션은 아래 사진처럼 주시는게 제일 깔금합니다.
2. 이미지 Assets에 추가하기
-> Assets에 추가하게 되면 imageLiteral로 호출이 가능합니다.
이미지 이름으로 자동완성하게되면 이미지가 작은 미리보기와 함께 표시되고 이미지를 주석처리해서 보시면 #imageLiteral로 선언되어있는걸 볼 수 있습니다. ->
이렇게 추가한 이미지를 imageView에 set 해주시면 됩니다.
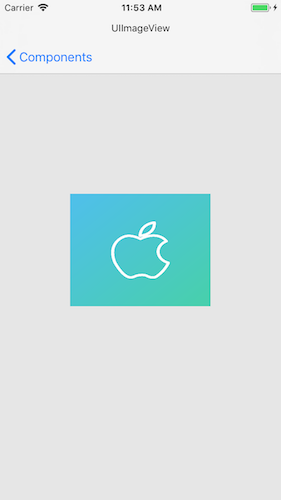
아래 스크린샷과 소스코드를 비교해보시면 좀 더 이해하기 편할겁니다.
궁금하신점은 댓글로 달아주세요.
해피코딩 :)
Preview
Advance preparation

Source
This file contains hidden or bidirectional Unicode text that may be interpreted or compiled differently than what appears below. To review, open the file in an editor that reveals hidden Unicode characters.
Learn more about bidirectional Unicode characters
| // | |
| // ImageViewViewController.swift | |
| // UIKit component handling | |
| // | |
| // Created by Taehyeon Han on 2018. 7. 31.. | |
| // Copyright © 2018년 calmone. All rights reserved. | |
| // | |
| import UIKit | |
| class ImageViewViewController: BaseViewController { | |
| lazy var imageView: UIImageView = { | |
| // Set the size of UIImageView. | |
| let width: CGFloat = self.view.bounds.width/2 | |
| let height: CGFloat = 150 | |
| // Set x, y of UIImageView. | |
| let posX: CGFloat = (self.view.bounds.width - width)/2 | |
| let posY: CGFloat = (self.view.bounds.height - height)/2 | |
| // Create UIImageView. | |
| let imageView = UIImageView(frame: CGRect(x: posX, y: posY, width: width, height: height)) | |
| // Create UIImage. | |
| let myImage: UIImage = UIImage(named: "apple.png")! | |
| // Set the image to UIImageView. | |
| imageView.image = myImage | |
| return imageView | |
| }() | |
| override func viewDidLoad() { | |
| super.viewDidLoad() | |
| // Do any additional setup after loading the view. | |
| // Add UIImageView to view | |
| self.view.addSubview(self.imageView) | |
| } | |
| override func didReceiveMemoryWarning() { | |
| super.didReceiveMemoryWarning() | |
| // Dispose of any resources that can be recreated. | |
| } | |
| } |
Github
https://github.com/calmone/iOS-UIKit-component
Reference
- UIImageView
https://developer.apple.com/reference/uikit/uiimageview - UIImage
https://developer.apple.com/reference/uikit/uiimage


